Getting started with your first knowledge base--or creating an additional knowledge base from scratch--can seem like an overwhelming task. We've come up with these lists of questions/considerations to help make the process more straightforward.
A few quick notes on using these lists:
- Technically, you don't have to do any of these things to start creating content. But we want you to have a framework for making a thoughtful evaluation or successful implementation of KnowledgeOwl. 😊
- These steps aren't linear, so you're welcome to tackle them in any order you'd like. Trust your instincts and have some fun.
- Some steps may be unnecessary based on your knowledge base configuration/needs.
- This list includes some workflow/best practice items--these are suggestions, not requirements!
Step 1: Add the KnowledgeOwl SP info to your IdP
Generally speaking, when adding a Service Provider (SP) to your Identity Provider (IdP), there are four pieces of information that you need about the SP:
- SP Entity ID
- SP Login URL — sometimes referred to as a "sign on URL"
- SP Logout URL — some systems do not ask for this
All three of these fields can be found in your knowledge base in Settings > SSO in the SAML Settings tab: Sample SP entity ID and login/logout URLs
 - Name ID Format — some systems do not ask for this. If yours needs it, you should set it to "Unspecified" or, if you need the long version: "urn:oasis:names:tc:SAML:1.1:nameid-format:unspecified"
Step 2: Add your IdP info to KnowledgeOwl
Once you have entered those pieces of information into your IdP, the IdP should provide you with the same three pieces of information as above, but for the IdP side of the connection:
- IdP Entity ID
- IdP Login URL — sometimes referred to as a "sign on URL"
- IdP Logout URL — if the IdP does not provide this, use the login URL
Add this information into the appropriate fields in KnowledgeOwl, located just under the SP fields in Settings > SSO in the SAML Settings tab:

Be sure to Save your changes if you aren't ready to upload your certificate yet.
Step 3: Upload the IdP certificate to KnowledgeOwl
The IdP should also provide a public certificate. You will need to download the certificate and then upload it into KnowledgeOwl.
KnowledgeOwl expects a file formatted as .crt. If you are using Okta or another provider which saves the certificate as a .cert file, you'll need to resave it as .crt.
Once you have your certificate in .crt format, go to Settings > SSO. Be sure you're in the SAML Settings tab.
Click on the Upload certificate option in the IdP Certificate section, which is located just under the IdP URL fields:

The link will open a file browsing window where you can select the .crt file to upload. Once you upload, a pop-up will appear to confirm if the certificate was updated successfully:

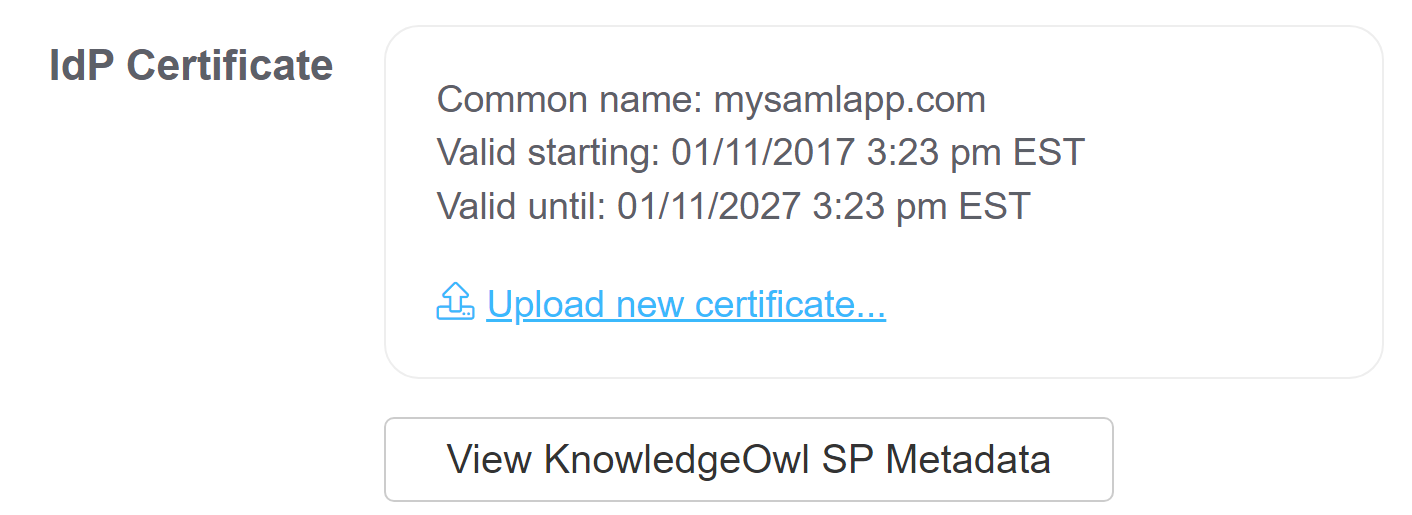
Once you click OK to close that pop-up, the IdP Certificate section should update to display the certificate's details. For example:
 Sample IdP certificate details
Step 4: Enable SAML SSO
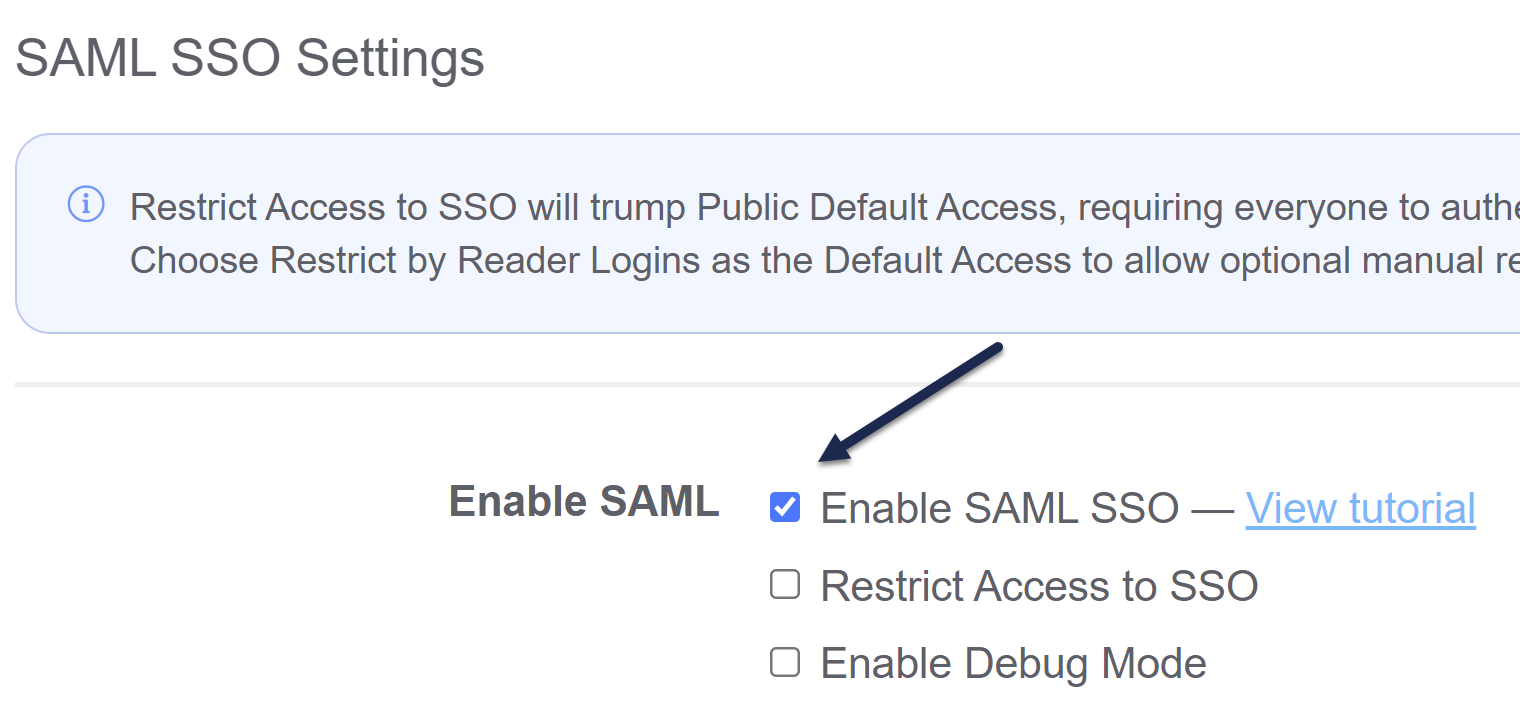
Once you have entered the three IdP fields and have uploaded the IdP certificate into KnowledgeOwl, make sure that the Enable SAML SSO checkbox is checked, and Save the SSO Settings page.

Step 5: Add the KnowledgeOwl x509 certificate to your IdP
If your IdP requires it, you can access the x509 certificate in KnowledgeOwl:
- Go to Settings > SSO.
- In the SAML Settings tab, click the View KnowledgeOwl SP Metadata button. If you aren't seeing any metadata, ensure that you've checked the box to "Enable SAML SSO" and saved. The metadata is only generated after this option is saved.
- This will open a pop-up with your x509 certificate information in it.
- Click anywhere in the Service Provider Metadata for Knowledge Base pop-up to highlight the full XML contents and copy it.
- Then copy the text and paste where necessary (you may need to put in a text editor to save this as a .crt file, an .xml file, or some other format--check your IdP's requirements).
Step 6: Map SAML attributes to fields in KnowledgeOwl
Now that the IdP URLs have been added to your knowledge base settings and vice versa with the SP URLs into your IdP, you will need to configure your IdP to pass over identifying information about the users logging in so that we can create / update them within your KnowledgeOwl account.
These mappings are configured in Settings > SSO in the SAML Attribute Map tab.
The minimum required information needed to successfully log a user in through SAML SSO is a unique ID (SSO ID) and an email address. The user's email address can be used as both the SSO ID and their email address if this is preferred.
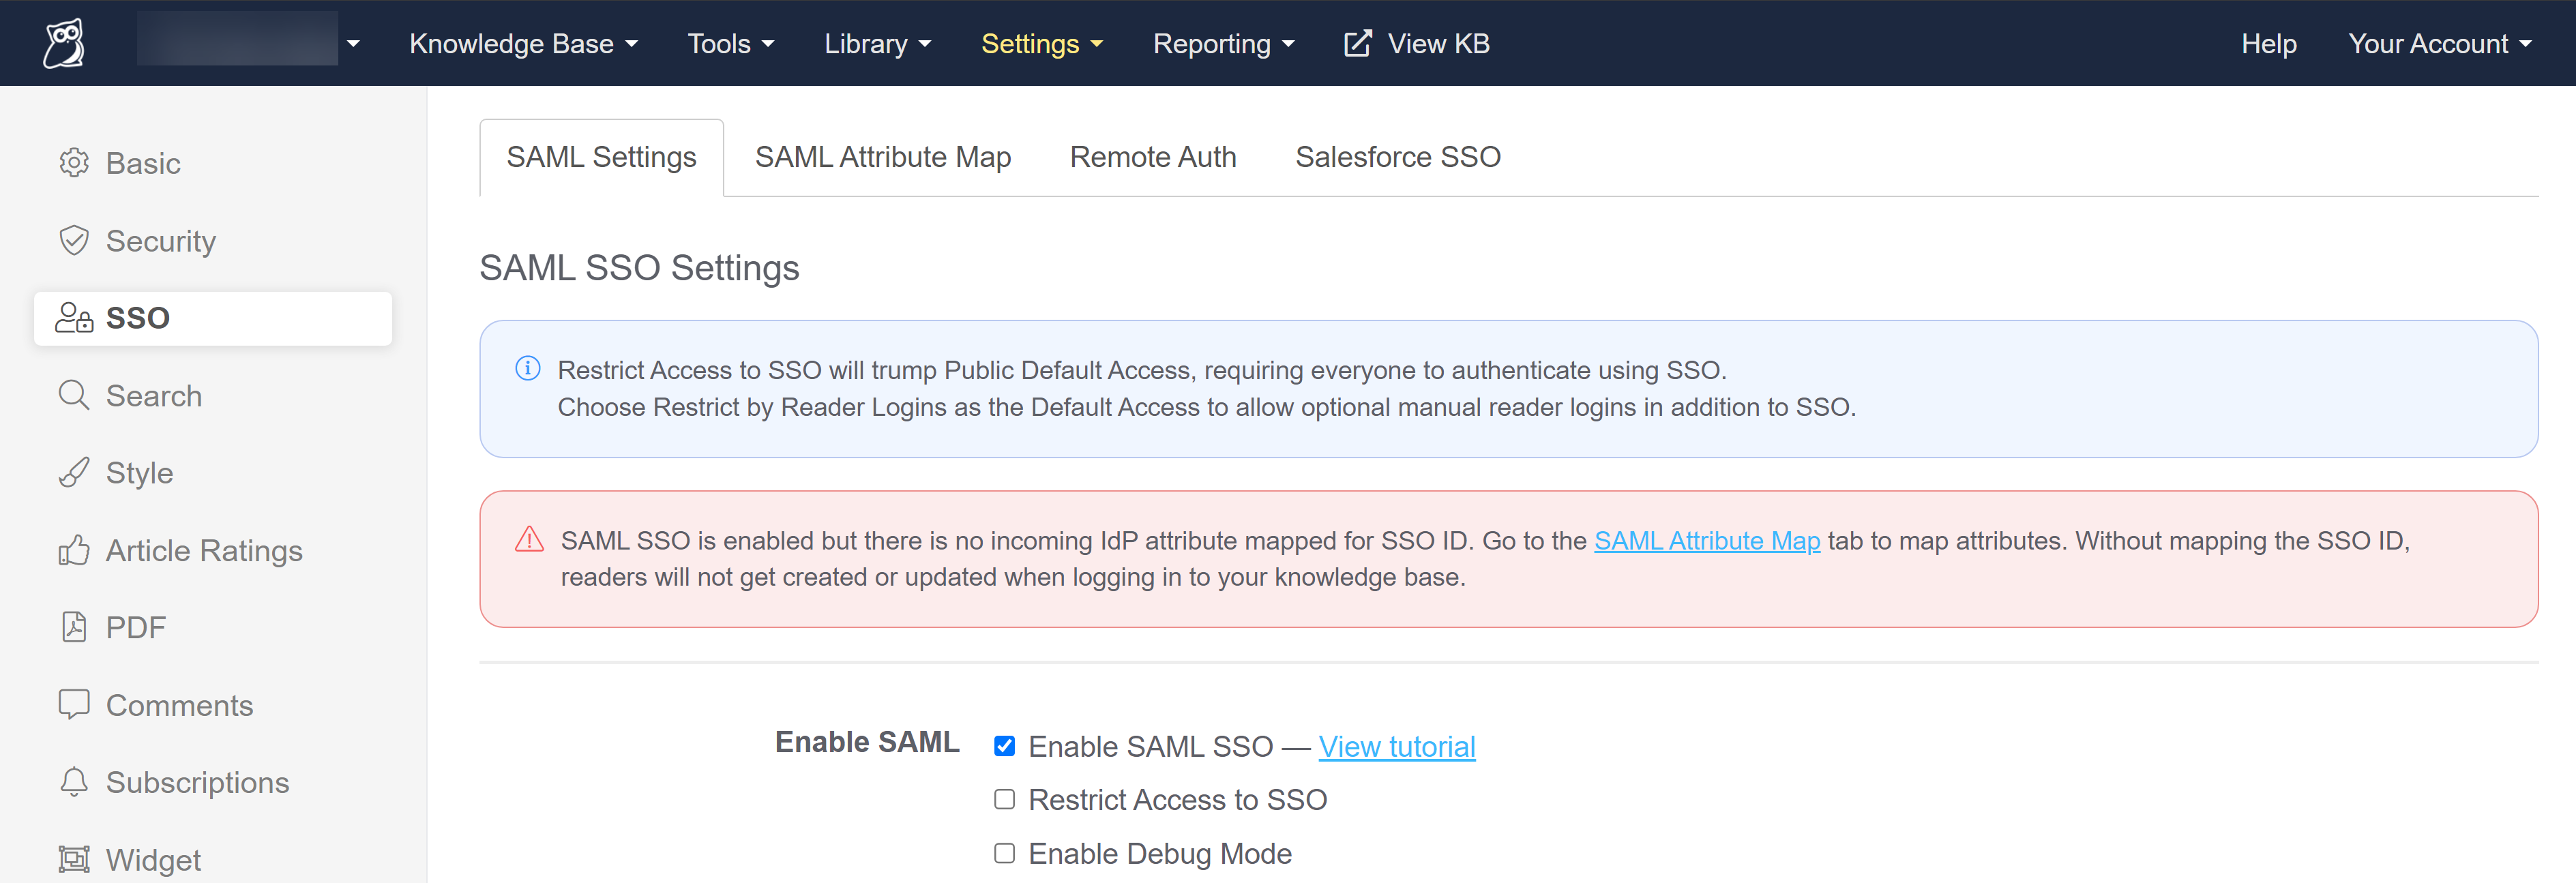
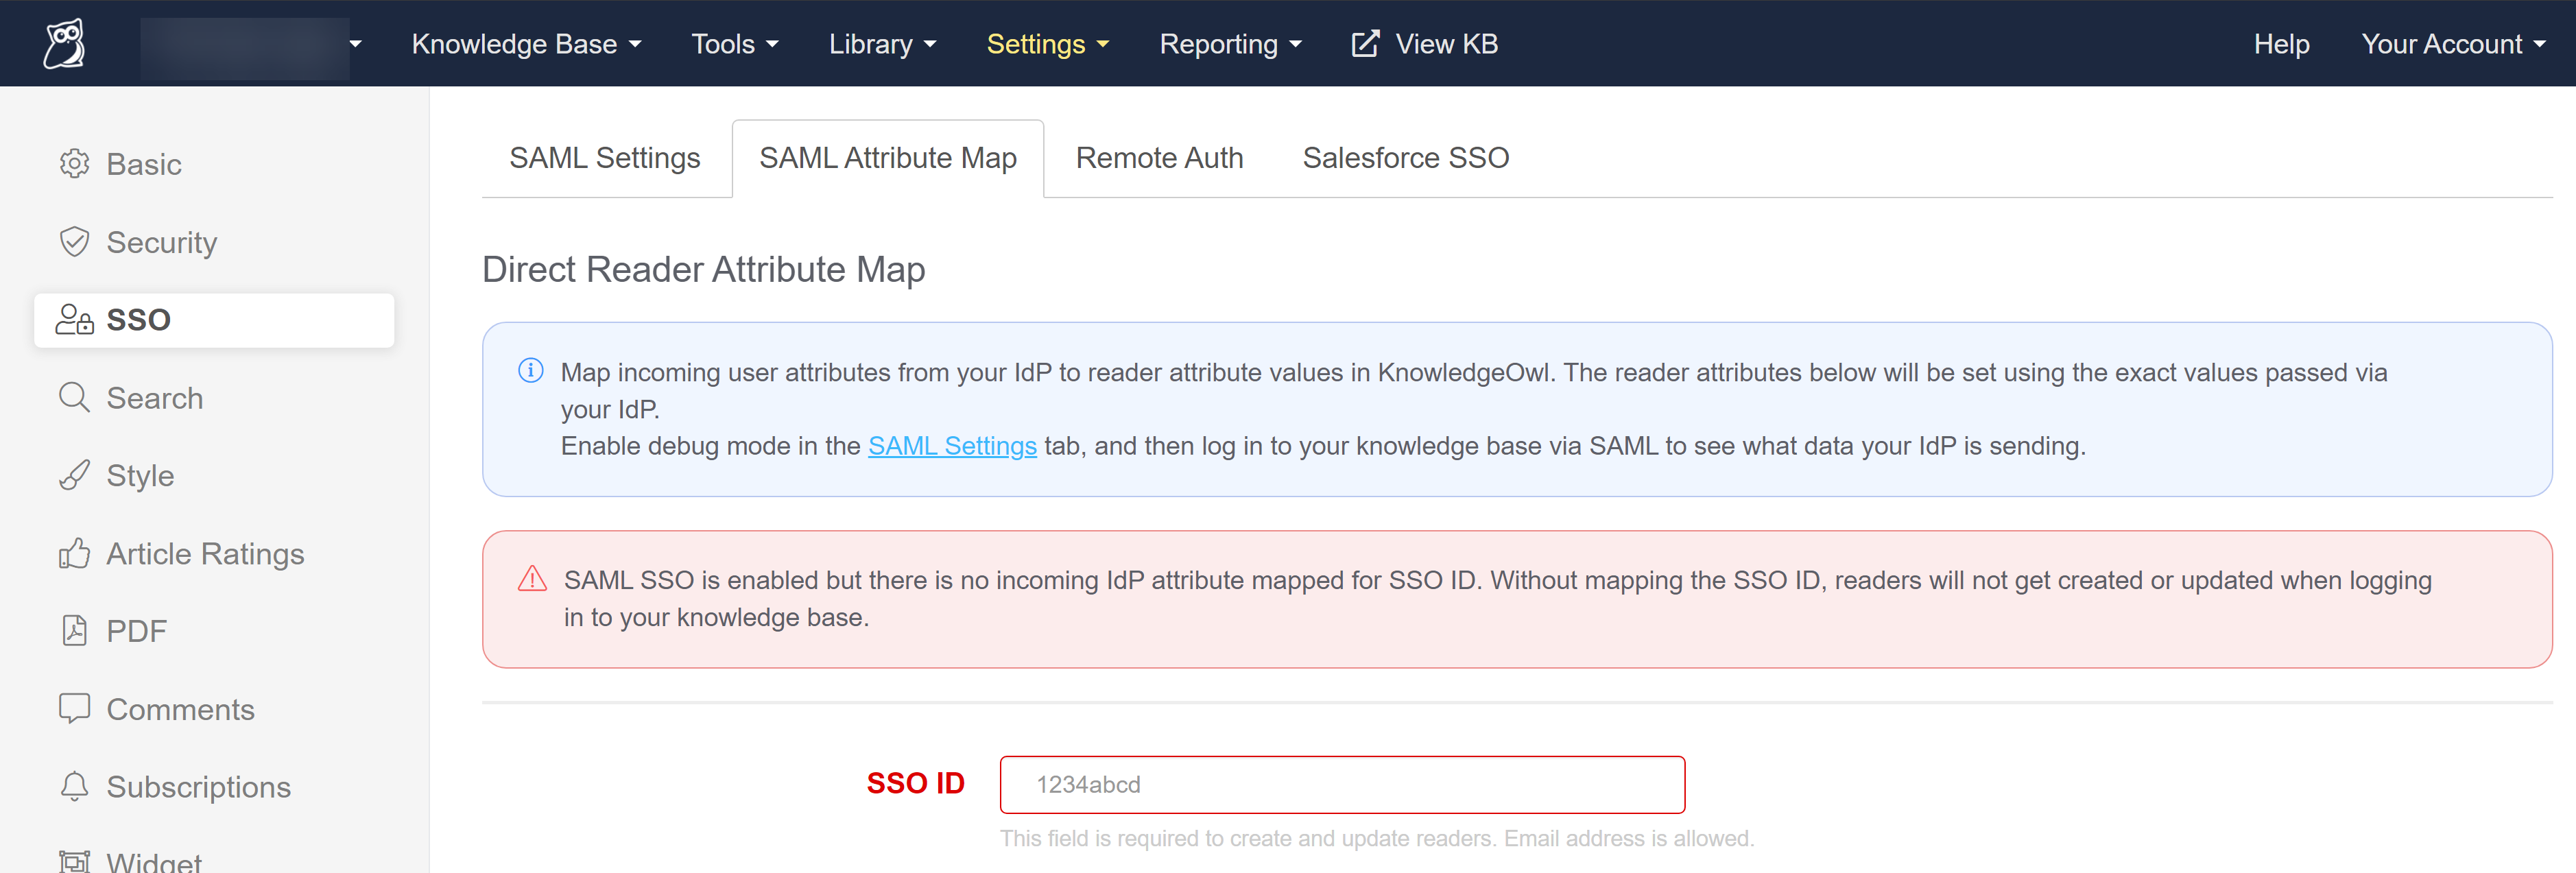
If you don't have a mapping set up for the SSO ID, you'll see warnings in Setting > SSO in the SAML Settings tab and the SAML Attribute Map tab:
 Warning message on SAML Settings when missing SSO ID mapping
 Warning message on SAML Attribute Map when missing SSO ID mapping
In the IdP, there should be a mechanism to add outgoing attributes where you can choose a name and select the appropriate field from the IdP's database.
Add the user's email and any other information you would like to the outgoing attributes. Choose names that make sense for these attributes, such as "email", "firstName", and so on.
- In KnowledgeOwl, go to Settings > SSO.
- Click on the SAML Attribute Map tab.
- Paste the names of the outgoing IdP attributes that correspond to the KnowledgeOwl reader attributes in the Direct Reader Attribute Map section.
- If you cannot directly map an IdP attribute to a KnowledgeOwl reader attribute, you can use Custom Attribute Map Rules to do some mappings or logic for you. See the help page on those rules for more info.
- Once you're done adding attribute mappings, Save.
If everything has been done correctly up to this point, you should be able to open a new incognito or private browser window and log into your knowledge base by pasting the SP Login URL.
Step 7: Optional settings
With your SAML SSO login working, you can now review two additional options:
- To make it so that SAML SSO is the only access method for your knowledge base, check the Restrict Access to SSO box in Settings > SSO and Save. This will override the Default Access selection in Settings > Security.
- If you'd like to use the SAML SSO as your only or primary reader authentication mechanism, set the Default Login Page in Settings > Security to SAML Login URL and Save.
See SSO options for different knowledge base setups for more information.
Troubleshooting
If you try to open the SP Login URL and the resulting page does not resolve, make sure that the IdP Login URL is correct, that it is using HTTPS, and that you can resolve the page by going to the IdP login URL directly.
If you are able to successfully log into your IdP but you get redirected to the "No Access" page with your knowledge base:
- Go to Settings > SSO.
- Check the box next to Enable Debug Mode near the top of the SAML Settings tab
- Save those settings.
- Now open the SP Login URL again.
- If you see an error on the resulting debug page after logging in:
- You may have an issue with the IdP certificate you uploaded, or
- Your IdP may require one of the Advanced Options to be enabled in the SAML Settings tab.
- If you don't see an error on the debut page after logging in:
- Make sure that the IdP attribute names listed on the debug page match the values listed when you click on the SAML Attribute Map tab.
- Make sure that the SSO ID and Username / Email fields have values entered in the SAML Attribute Map tab.
- If you see an error on the resulting debug page after logging in:
- Once you're done troubleshooting, be sure to uncheck the Enable Debug Mode box and save the SAML Settings.
- If you're still having trouble after trying all of the above steps, contact our support team and we will try to help figure out what the issue is.
Before you begin
While we all love building a new knowledge base (SO EXCITING), it's good to have a quick intro to KnowledgeOwl and give some thought to what you want this knowledge base to be/do.
Here's what we suggest:
- If you're totally new to KnowledgeOwl, go through our Intro to KnowledgeOwl to learn quick basics
- Define your knowledge base's purpose and audience.
- Optional: Dive deeper into your knowledge base plan by using our Knowledge Base Brief template.
Building your knowledge base
- Set up your knowledge base's basic configuration.
- Set up your knowledge base URL/domain.
- Adjust the look and feel to fit your branding needs.
- Determine who can access your knowledge base, and how.
- Configure and enable the features you'd like to use.
- Determine appropriate author roles and permissions. (If you're a solo writer, skip this!)
- Create some categories and articles, and share your knowledge base with the world! (Or at least a close friend. 😉)
Best practices & ongoing maintenance
- Determine the best layout and hierarchy for your content.
- Create version guidelines to define how/when you'll use versions.
- Determine what kind of reporting/feedback will help you.
- Determine a content audit cycle and which feature(s) you'll use to help with it.
- Create a style or author's guide about how to create/update content in KnowledgeOwl.
- Document the choices you made in setting up your knowledge base. (Your future self or a future hire will thank you!)


 Copyright © 2020 – 2023 Your Company, LLC. All rights reserved.